FANGUS, the Werebaby!
February 19, 2012
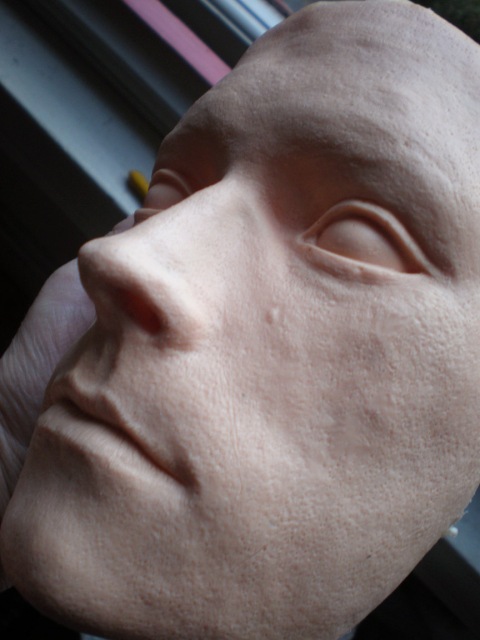
This is the initial stage in modeling the head of a Werebaby.
I made two different kinds of bodies; a silicone one with a twisted wire armature inside (dark blue), and one with a ball and socked armature that was padded and dressed in a fabric baby-gro.
In a short animation sequence he will transform form the ordinary baby – pictured below, into a much hairier and toothier one!
Rough Cut Animation – Doris the Houskeeper
November 22, 2011
Here’s a rough cut of the short animated sequence that Jess Ashman, Nikki Welbourne and I did a wee while ago. It’s not the finished item (other work related projects took over) so it still needs to be tweaked in the edit and a soundtrack dubbed in. Couldn’t resist posting it though!
Hoping to feature Doris the Housekeeper in longer adventures soon!
Little Objects for Forthcoming Animations
July 19, 2011
I’m working on a basic set which has to have three functions. These are some of the things I’ve been making for it.
The headboard of the cot is about 20cm high and about 14 cm wide. It has a fantastic little blanket which was made by an extremely skilled knitter – I’m hoping to persuade her to knit clothing on an insanely tiny scale for some of my character models.
The bay window has been finished now, but below is a picture of it mid construction. I’ve still to build a frame behind it for a mock-up of an exterior scene which will be of a night sky.
This set also has some patterned wallpaper and a cabinet (inset). There will be a night-light/lamp on top of it. The wall paper was adapted from a sheet of wrapping paper which was bought in a vintage store in Japan.
Pictures of characters in the completed sets to follow.
Doris Dog
June 19, 2011
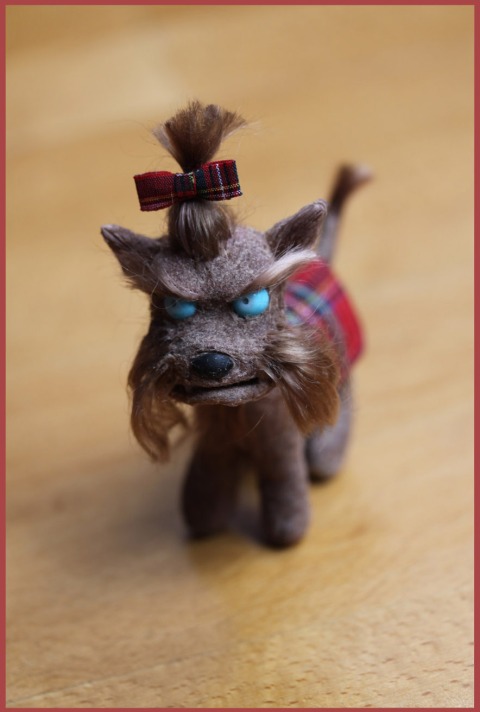
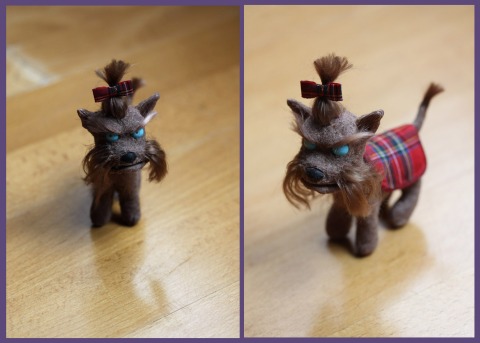
I’ve finished Doris’s dog, and have given him a little tartan coat and bow for his hair.
The eyes were supposed to be temporary – substituted with off-white ones of the same size, but I’ve grown used to these blue ones and may keep them in. He took longer to make than expected and was a bit of a fiddle, in fact that scowling expression he has mirrors the one I wore for much of the making process. Still he’s finished now and I love him!
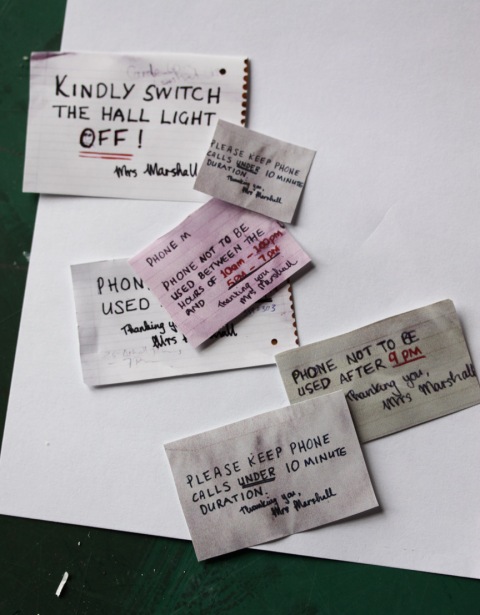
Decided to make a payphone for the hall, with lots of notes sello-taped up around it. Doris was very fond of leaving notes with her rules and regulations plastered all over the place.
This is the kind of thing they used to say:
and finally, in situ on the wall of the set.
Only a few more things to do before starting a little test animation! – oh wait, damn, I need a new computer first… Let’s just say I hope to have something to show soonish.
Set for Doris
June 1, 2011
After a spell making prop weapons and rockets, I’ve had a chance to start making a small section of hallway for a test animation of Doris.
I’m re-using a door from a previous set and have adjusted it to open in the opposite way – reversing the door handle and finger plate positions.
I’ve started the walls for the hallway set.
The paper on the walls was made using fantastic embossed gift wrap that had been found in the store-room of an old stationery shop that has long since closed. It’s precious as I’ve only got a few sheets of it left and sadly, probably not enough to do a whole room.
I’ve also started to make a small pet dog which may also feature in the animation. He’s at the early stages now and looks like this:
Haven’t thought of a suitably unsuitable name for him/her yet!
Doris: “The Housekeeper”
April 27, 2011
Once the head was out of the mould, I painted in the features and started to add the hair.
The hands have been cast with a twisted wire armature inside them, they’re just out of the mould here and haven’t been trimmed yet. The real Doris wore nail varnish so I’ll paint that on.
I’m not sure what exactly what she wore on her feet, it may have been some sort of leatherette type slipper but I’ve chosen to make ones with a furry bit at the front. They’ve been cast in silicone and painted before the fur was added and trimmed.
I’ve spent quite a bit of time trying to get the body shape just right and trying to recreate her stance. She has an aluminium wire armature at the moment but I’m going to have to replace it with a ball and socket one at some point. For the moment though, I’ll use this one to do some test animations with.
Luckily my local fabric shop had some ideal fabric to recreate her brown ‘slacks’, and I’ve given her a little sleeveless top to go with it as well as a dowdy grey blouse.
She’s nearing completion in the above photograph.
And finally, with glasses attached and a little walking stick to help her waddle along, she’s finished.
There’s some more pic’s of Doris in different poses in the ‘Pages’ section: Doris Slideshow
Doris Marshall
April 9, 2011
This character is based on an old lady who, in the guise of ‘housekeeper’, terrorized the inhabitants of an old Victorian house in Glasgow.
Although it was several years ago I still remember her beady little chameleon eyes behind thick rimmed glasses and her brown, bri-nylon slacks.
Sadly I never took a photograph of her – I wouldn’t dare – so I drew this sketch from memory (but it’s a near photographic likeness, honest)
Based on this drawing I started modeling the clay head and gnarly hands. I seem to remember that hers had quite blunt fingers with big nicotine stained fingernails that looked as if they’d been carved out of goat horn or something.
These are the clay ones ready to have a mould made of them and below, the mould for the glasses which I haven’t cast yet.
Continued soon when hopefully I’ll have time to do some more work on her…
Head Sculpture, Part 3: Casting and Painting
March 31, 2011
The next stage in making the model head is to cast it in silicone.
I tinted some silicone with flesh coloured pigment and cast it. When cured I filled the cavity with urethane foam to support the outer skin.
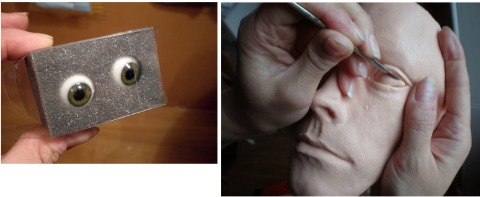
The hollow glass eyes are so fragile, I like the way they are packaged – nestling snugly in foam rubber inside a clear box.
The next stage : applying paint.
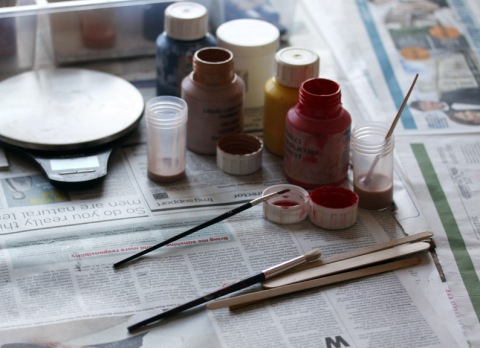
I used pigments added to psycho paint to add the more subtle touches, freckles lip colour, and the pink bits in the corner of the eyes etc.
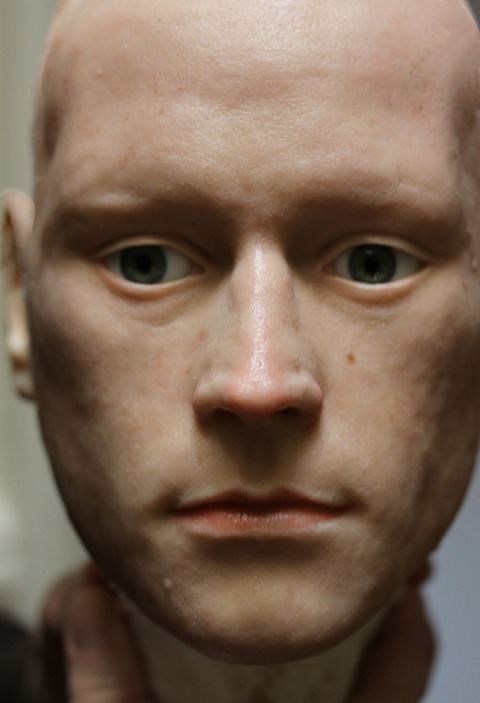
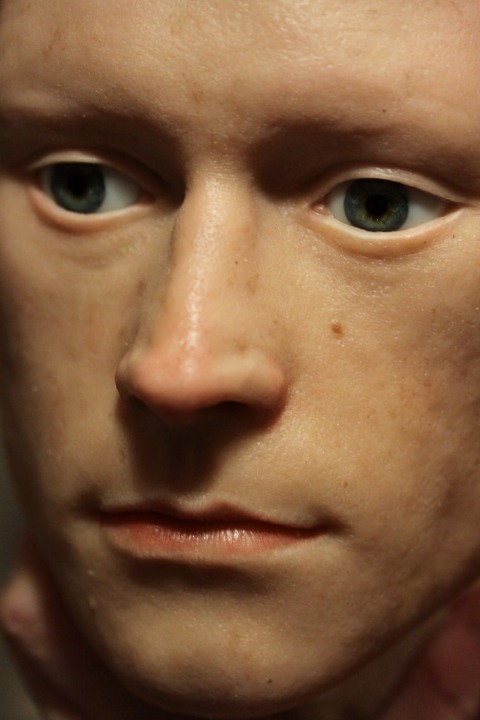
Now that the painting is completed the final stage will be to root the hair, eyelashes and eyebrows.
Head Sculpture Part Two: Mould Making
March 17, 2011
After re-stocking with silicone I was able to move on to the next part of the process:
I built a clay wall on the finished sculpture where the separation line would be – this had indents to provide registration points. As this is a test piece I didn’t worry too much about the neck and shoulder area and kept it simple by doing a 2 part mould with the most obvious separation line.
I left the sculpture uncovered for a few hours to lower the surface moisture level and then painted the whole thing with button polish.
The next stage was to cover it in a thin layer of silicone with added thixotropic agent to capture the surface detail. Once that had cured I removed the clay wall and trimmed off any excess silicone.
I applied some general purpose resin and fibreglass matting on top of that to provide a rigid shell, then repeated the whole process on the other half of the mould.
The edges of the mould were trimmed off before the resin had completely hardened to provide a neat edge. Finally I gave it a quick hand sand to remove any stray matting fibres (that can embed themselves in your fingers) and drilled holes in the flange for the hex bolts to go through.
The view of the inside of the mould looks like this.
Next stage (in a wee while) : Casting
Old Lady Fight!
March 7, 2011
Old ladies let loose in the Scout Jumble…
I made a very makeshift scene for the two old ladies, but eventually I’d like to make a Community Hall or Scout Hall set, for this little scenario to be played out in. It would be one of six or so little animated sketches that would feature these two characters.
While they were waiting to be photographed, I could hear snatches of their conversation…
More pic’s in Portfolio: Page 9
copyright 2011
Stop-motion Models (Part 2)
March 2, 2011
Luckily, I found a very small amount of silicone lurking at the back of a cupboard and it was just enough to get the heads, hands and feet the two old ladies done.
The picture on the right has been fully painted and the hat I made is inspired by the kind of pressed felt ones that are occasionally sported by elderly ladies. The hair for this head will be curly – either a tight perm or just very wavy. She hasn’t got her glasses yet, but that’s the mould for them just to the left of her head.
Plump lady has been painted but doesn’t have eyeballs yet and I’ve started to punch in the hair – I like this wild, insane look but the finished style will feature a bun on top of her head.
Below are pictures of the shoes and hands being embedded in clay, and enclosed in a wall ready for making the plaster mould.
Once they were cast, the flashing was trimmed off and the shoes were painted. I embedded a block of chavant clay inside the boots so that once it was removed it would leave a cavity big enough to accommodate the foot section of the armature. Because they were so tiny, I used very thin wire inside the hands to allow the fingers to bend. They’ll be attached to the arms with a small section of K&S brass tubing – the smaller piece on the armature sliding inside the section in silicone wrist. The picture below shows the fingers bent (I’ve removed the K&S in the wrists temporarily).
The shoes may have to be matted to take off some of the glossy sheen that you invariably get when painting with silicone. For the hand bags, I chose to make one from vinyl and one from card, the card one isn’t quite finished yet.
Finally, the last picture shows the assembled body of one character complete with knobbly fingers, thick stockings but minus a head. Plump lady’s being worked on at the moment and doesn’t want to be photographed ’till she’s looking her best.
Final assembly in Next post.
Stop-motion Models (part 1.)
February 21, 2011
While materials are on order to make the mould for my head sculpture, I thought I’d do something on another project I’m working on at the same time. I’m making two old lady characters – a thin one and a very plump one, and I’m about half way through the process. Pictured below are the two clay sculpts for the heads.
Once I’d sculpted the faces, hands and shoes in clay, I made the moulds for them (haven’t cast them yet as I need to order silicone for this too).
For speed, I’m re-using armatures from a different project. They’re the kit kind that don’t need silver soldering.
The tiny patterns for the clothes were drawn out on kitchen paper and then a quick toile in plain fabric was made to see if any adjustments were needed.
I chose tweedy looking fabric that I thought would be good on a small scale and spent happy evenings in front of the telly, sewing them all together by hand (they were too small machine).
Fur trimmed coat, front and back views.
That’s the progress so far. Once all the different bit’s are cast and painted and the hair added, I’ll make the hat, handbag and other accessories – more in Part 2…


